Roof flashing is an essential but often overlooked component of your home's roofing system. Roof flashing may seem inconspicuous, but it plays a critical role in protecting your home from water damage and ensuring its structural integrity. Whether you're a seasoned homeowner or a first-time buyer, understanding the importance of roof flashing and knowing how to maintain and repair it can save you from costly repairs down the road. In this comprehensive guide, we'll demystify the world of roof flashing, explore its various types and materials, discuss installation and maintenance best practices, and equip you with the knowledge needed to make informed decisions about your home's roofing system. So, let's dive into the world of roof flashing and empower you to safeguard your home like a pro!
The Importance Of Roof Flashing
As a homeowner, understanding the importance of roof flashing is crucial for maintaining the integrity and longevity of your home. Roof flashing serves as a protective barrier against water intrusion, one of the most common causes of damage to a roof. It is strategically installed at vulnerable areas such as roof joints, chimneys, skylights, vent pipes, and dormers to prevent water from seeping into your home and causing structural issues, mold growth, and costly repairs.
By directing water away from these vulnerable areas, roof flashing acts as a shield, ensuring that your home remains dry and protected during heavy rains, snowstorms, or even minor leaks. Without proper flashing, water can penetrate through gaps and cracks, leading to rotting wood, deteriorating insulation, and compromised ceilings and walls. By recognizing the significance of roof flashing and taking proactive measures to maintain and repair it, homeowners can safeguard their investment and enjoy a durable, leak-free home for years to come.

Roof Flashing Types And Materials
When it comes to roof flashing for residential roofs, there are various types and materials available, each serving specific purposes and catering to different roofing needs. Here are some common types of roof flashing and the materials typically used:
- Step flashing: This type of flashing is commonly used along the sloping areas of the roof, such as where the roof meets a wall or chimney. Step flashing consists of individual metal pieces, usually made of aluminum or galvanized steel, that are layered and step-shaped to create a watertight barrier.
- Valley flashing: Installed in the valleys where two roof slopes meet, valley flashing prevents water from pooling and causing leaks. It is often made of galvanized steel, aluminum, or copper due to their durability and resistance to corrosion.
- Drip edge flashing: Placed along the edges of the roof, drip edge flashing helps direct water away from the fascia and into the gutters, preventing water damage. Common materials for drip edge flashing include galvanized steel, aluminum, or PVC.
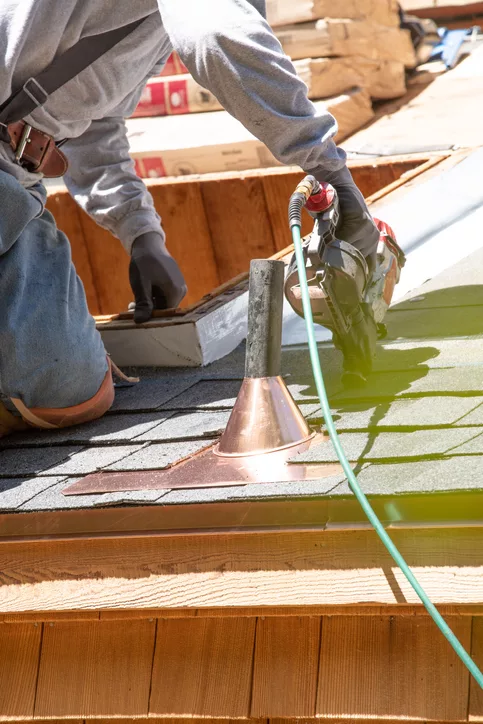
- Vent pipe flashing: This type of flashing is used around vent pipes or other protrusions through the roof. It typically consists of a rubber or neoprene boot that fits tightly around the pipe, providing a watertight seal.
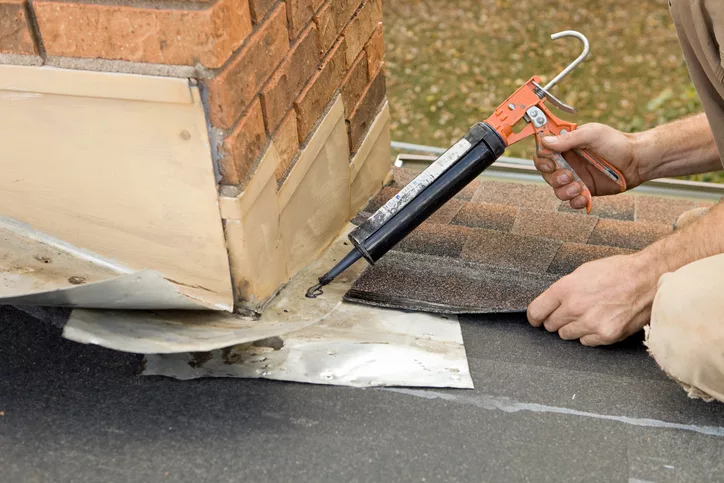
- Chimney flashing: Chimneys require special flashing to ensure water doesn't penetrate the roof. Chimney flashing often involves a combination of step flashing, counter flashing (metal pieces that cover the step flashing), and a base flashing that seals the chimney base.
Materials used for roof flashing can vary depending on the specific type and budget. Common materials include galvanized steel, aluminum, copper, lead, and rubberized asphalt. Each material has its own benefits in terms of durability, weather resistance, and aesthetics.
Remember, selecting the appropriate type and material for your roof flashing is essential for maintaining a watertight seal and protecting your home from water damage. Consulting with a professional roofer or contractor can help you determine the best choice for your specific roofing needs.
How To Maintain Roof Flashing
As a homeowner, there are several proactive steps you can take to help maintain your roof flashing and prolong its lifespan. Consider the following maintenance tips:
Regular Inspections: Schedule periodic roof inspections to assess the condition of your flashing. Look for signs of wear, rust, cracks, or gaps that could compromise its effectiveness. Inspections are especially important after severe weather events or if you notice any water stains or leaks inside your home.
Clear Debris: Keep your roof free of debris like leaves, branches, and dirt that can accumulate and block the flow of water around the flashing. Regularly clean your gutters and downspouts to prevent clogs that may lead to water backup and potential flashing damage.
Trim Overhanging Branches: Trim any tree branches that are in close proximity to your roof. Overhanging branches can scrape against the flashing, causing damage or dislodging it over time.
Address Moss or Algae Growth: If you notice moss or algae growing on your roof or flashing, take steps to remove it promptly. These organisms can trap moisture and accelerate the deterioration of the flashing. Use appropriate cleaning solutions or consult with a professional for safe and effective removal methods.
Maintain Proper Ventilation: Ensure your attic has proper ventilation to prevent excess heat and moisture buildup. Excessive heat and moisture can degrade the flashing prematurely. Check your attic vents, fans, and insulation to maintain a well-ventilated and dry environment.
Professional Maintenance: Consider hiring a professional roofer for periodic roof maintenance. They can inspect your flashing, make necessary repairs, and provide guidance on its upkeep. Professional maintenance can catch potential issues early on and save you from more significant problems down the line.
Remember, if you notice any signs of damage or suspect issues with your roof flashing, it's best to consult with a qualified roofing professional. They have the expertise to assess the situation accurately and perform any necessary repairs or replacements to ensure your flashing remains effective in protecting your home from water damage.
How To Repair Roof Flashing
Repairing roof flashing can be a task that some homeowners can tackle on their own, depending on the extent of the damage and their level of comfort with DIY projects. However, it's important to note that working on the roof can be dangerous, and improper repairs can lead to further damage or leaks. If you're considering repairing your roof flashing yourself, keep the following guidelines in mind:

- Assess the Extent of Damage: Evaluate the condition of the flashing and determine if it requires simple repairs or if it's a more complex issue that may require professional assistance. Minor repairs like sealing small cracks or reattaching loose flashing may be manageable for a homeowner, while extensive damage or structural issues probably warrants professional intervention.
- Gather the Necessary Tools and Materials: Ensure you have the right tools and materials for the specific type of flashing and repair needed. This may include roofing cement, roofing nails, a caulking gun, a pry bar, a hammer, and appropriate safety equipment such as gloves, goggles, and non-slip footwear.
- Follow Manufacturer Guidelines: If possible, refer to the manufacturer's instructions or guidelines for repairing the specific type of flashing you have. This can provide valuable insights on proper techniques and materials to use.
- Take Safety Precautions: Prioritize your safety by using sturdy ladders, having someone nearby to assist you, and wearing appropriate protective gear. It's also essential to work on a dry day with good weather conditions to minimize the risk of accidents.
- Proceed with Caution: Carefully remove any damaged or deteriorated flashing using the appropriate tools. Clean the area thoroughly, removing any debris or old caulking. Apply the recommended repair materials, ensuring a watertight seal and proper attachment to the roof surface.
- Monitor the Repair: After completing the repair, keep an eye on the area for any signs of continued leaks or further damage. If you notice persistent issues or the repair doesn't resolve the problem, it's advisable to consult with a professional roofer to avoid exacerbating the situation.
It's worth noting that some roofing projects, especially those involving more complex flashing systems or extensive repairs, are best left to experienced residential roof repair professionals. They have the necessary expertise, tools, and knowledge to ensure a thorough and long-lasting repair. If you're unsure about your abilities or the severity of the damage, it's always wise to consult with a professional roofer who can assess the situation and provide appropriate guidance.
Roof Flashing Installation
Installing roof flashing requires careful attention to detail and adherence to proper techniques in order to prevent even more problems. Here is a general step-by-step guide on how to install roof flashing:
- Gather Materials and Tools: Make sure you have all the necessary materials and tools ready before starting the installation process. This typically includes the appropriate type of flashing for your specific needs, roofing cement or sealant, roofing nails, a pry bar, a caulking gun, a hammer, and safety equipment such as gloves and goggles.
- Prepare the Roof Surface: Ensure that the area where the flashing will be installed is clean, dry, and free from debris. Remove any old or damaged flashing, nails, or caulking from the area using a pry bar or appropriate tools.
- Measure and Cut Flashing: Measure the length and shape needed for the flashing based on the specific area where it will be installed. Use tin snips or a similar tool to cut the flashing to the required size and shape.
- Position the Flashing: Carefully position the flashing in the desired location, ensuring it covers the vulnerable area where water could potentially penetrate the roof. The flashing should overlap adjoining materials, such as shingles or walls, by at least a few inches to provide adequate protection.
- Attach the Flashing: Secure the flashing in place using roofing nails or other recommended fasteners. Place the nails or fasteners along the edges and corners of the flashing, ensuring a secure and tight fit. Take care not to overdrive the nails, as this can damage the flashing.
- Seal the Flashing: Apply roofing cement or sealant to the edges and seams of the flashing to create a watertight seal. Use a caulking gun or a putty knife to carefully apply the sealant, ensuring it covers any gaps or exposed areas. Smooth out the sealant to create an even, uniform seal.
- Inspect and Test: Once the flashing is installed and sealed, visually inspect the area to ensure there are no visible gaps or loose edges. Additionally, perform a water test by gently spraying the area with a hose to check for any leaks or water penetration.
It's important to note that the specific installation process may vary depending on the type of flashing and the area being addressed (e.g., chimney flashing, step flashing, etc.). It's recommended to consult manufacturer guidelines or seek advice from a professional roofer for detailed instructions specific to your roofing system.
Hopefully this comprehensive roof flashing guide has opened up your eyes to the importance of functional roof flashing in protecting your roof and what is below it. We've also outlined important steps to follow on how to properly maintain, repair, and install your roof flashing to ensure your home remains safe and protected for years to come.
Unfortunately, roofing emergencies happen. If your damage is more than you can handle and you feel that you need professional assistance, we repair and replace roofs in and around San Antonio, Austin, Dallas, and Fort Worth, Texas. Contact us by clicking the button below and see how we can help you.
